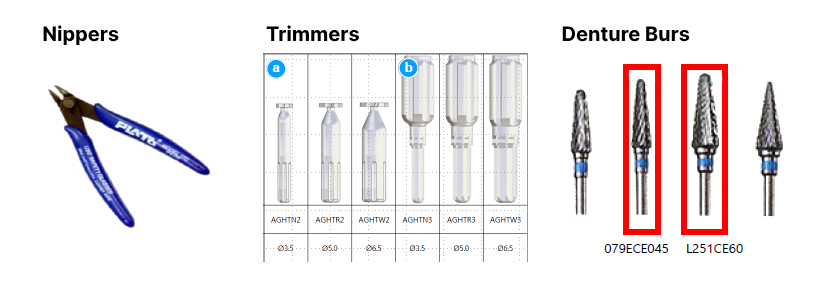
Surgical guides require additional finishing after printing. To ensure the drills engage smoothly and without obstruction, the guide's drill holes and stoppers must be adjusted using a trimmer. However, if the guide is consistently printing too loose around standard drill holes, we recommend calibrating your 3D printer.
Guide Hole & Stopper Trimmer
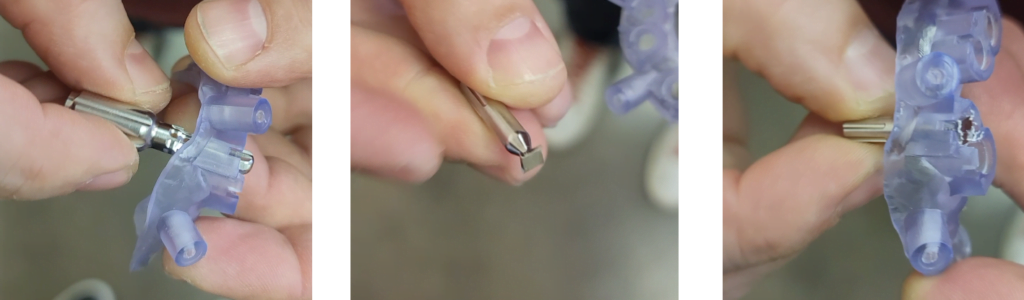
Insert the guide hole trimmer from below and rotate counter-clockwise a few times, then insert it from the top and rotate counter-clockwise a few times as well until there isn’t too much resistance. For the stopper trimmer, insert it into the guide from the top. Turn the trimmer clockwise to trim the stopper.
Tools for Trimming R2 Guide
Overview of R2 Guide Final Modification
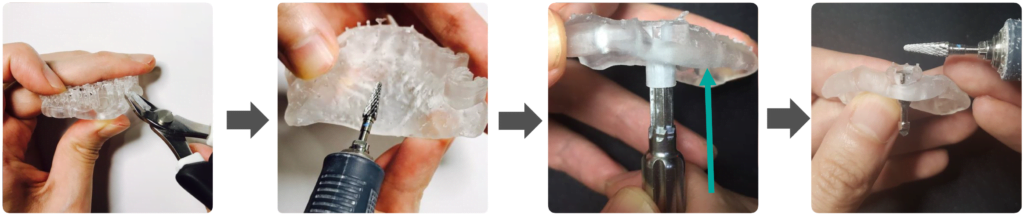
(1) Clip the supports using the nipper
(2) Smooth the sharp areas using a denture bur
(3) trim the guide hole using the drill stopper trimmer and guide hole trimmer
(4) then trim the top of the window carefully

(5) Check the height of the drill stopper
(6) Trim any anchor pin holes using 2mm drill
(7) Trim any undercut inside the guide
(8) and check the fit of the seating holes and cusps